
Table of Contents
- Understanding the Benefits of Buying a Domain for Microsoft 365 Integration
- Choosing the Right Domain Name for Your Microsoft 365 Needs
- Step-by-Step Guide to Purchasing a Domain for Microsoft 365
- Configuring Your New Domain with Microsoft 365 for Seamless Use
- Best Practices for Managing Your Domain and Microsoft 365 Subscription
- Q&A
- Insights and Conclusions

Understanding the Benefits of Buying a Domain for Microsoft 365 Integration
Acquiring a domain specifically for Microsoft 365 integration affords users several significant advantages. First and foremost, it enhances your organization’s professionalism and credibility. Having a custom domain (e.g., yourcompany.com) signals to clients and partners that your business is established and trustworthy, which is crucial in today’s competitive landscape. Moreover, using a custom domain allows for branded email addresses, significantly improving communication among employees and customers alike.
Another substantial benefit is the improved collaboration and productivity this integration facilitates. With Microsoft 365, users gain access to a suite of powerful tools including Outlook, SharePoint, and Teams. Owning a domain means you can seamlessly connect these tools to your organization’s specific needs. For instance, documents can be shared effortlessly through SharePoint, and scheduling meetings via Outlook becomes more streamlined when everyone uses the same domain, thus eliminating confusion and enhancing workflow efficiency.
Lastly, managing network security and compliance is simplified through domain integration. Microsoft 365 provides comprehensive security features and compliance solutions that protect your organization’s sensitive data. By owning a domain, you can take full advantage of these features, including advanced threat protection and data loss prevention. This not only safeguards your organization’s information but also fosters a culture of safety and reliability among employees. Embracing a domain for Microsoft 365 integration not only underpins your digital presence but also fortifies your operational framework.

Choosing the Right Domain Name for Your Microsoft 365 Needs
When embarking on your journey to establish a presence on Microsoft 365, the first step is selecting a domain name that resonates with your brand identity. A well-chosen domain not only reflects your business’s mission but also improves memorability for your audience. Consider the following essential factors when making your selection:
- Relevance: Your domain name should align closely with the products or services you offer. Incorporating keywords can enhance your visibility.
- Length: Aim for a concise name; shorter domain names are easier to remember and less prone to typos.
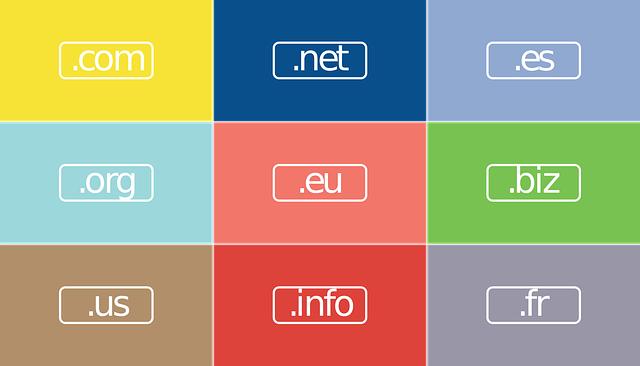
- Extension: While .com is the most recognized, don’t shy away from other suitable extensions like .net, .org, or even niche-specific options.
Another crucial aspect is the availability of your desired domain name. Conduct thorough research to see if it’s already in use or if similar names could lead to confusion. Tools like domain registrars and WHOIS databases can help verify availability. If your ideal name or keyword combination is taken, you might consider alternatives or slight variations that maintain brand integrity:
| Domain Option | Available Alternatives |
|---|---|
| yourbusiness.com | yourbusinessonline.com yourbusinesshq.com |
| bestsoftware.net | bestsoftware360.com bestsoftwaresolutions.org |
Lastly, consider the impact of your chosen domain on your branding and SEO efforts. A domain that establishes credibility and trust can aid greatly in differentiating your business in a crowded market. Before finalizing your decision, test it out by sharing it with friends or colleagues for feedback. Remember, your domain will be your digital identity, so choose wisely!
Step-by-Step Guide to Purchasing a Domain for Microsoft 365
Purchasing a domain for Microsoft 365 can seem daunting, but by following a straightforward process, you can make it simple and efficient. First, decide on a unique domain name that reflects your brand and is easy to remember. Consider incorporating relevant keywords that resonate with your business to enhance your online presence. Once you have a few name ideas, check their availability using a domain registrar’s search tool. Popular registrars include GoDaddy, Namecheap, and Bluehost.
After selecting an available domain, you’ll need to register it. This process typically involves creating an account with your chosen registrar. During registration, you may encounter options such as domain privacy protection, which is highly recommended to keep your personal information confidential. Fill in your billing details, select the length of registration (usually between 1 to 10 years), and complete the payment. Ensure you double-check the information you provide to avoid any registration issues later.
Once you’ve registered the domain, the final step is linking it to Microsoft 365. Start by logging into your Microsoft 365 admin center and navigating to the Setup section. Here, you’ll find an option to add your domain. Follow the prompts, which will typically involve verifying your domain ownership by adding a TXT record at your registrar. This can be done by copying the given record and pasting it into the DNS settings of your registrar. Don’t forget to save your changes! It may take a few hours for the DNS changes to propagate, but once completed, your domain will be fully operational with Microsoft 365 services.
Configuring Your New Domain with Microsoft 365 for Seamless Use
Once you’ve purchased your domain, the next step is configuring it with Microsoft 365 to ensure optimal performance and user experience. Start by accessing the Microsoft 365 admin center. Navigate to the “Setup” section and choose “Domains.” Here, you’ll be prompted to add your new domain. Enter the domain name you purchased and follow the on-screen prompts to verify ownership. This typically involves adding a TXT record to your domain’s DNS settings, which can usually be done via your domain registrar’s control panel.
After verification, you’ll need to configure DNS records for various Microsoft 365 services. The setup typically requires the following records:
- MX Record: Directs email to Microsoft servers.
- CNAME Record: For services like Exchange Online and SharePoint.
- TXT Record: Used for verification and SPF settings.
To simplify this process, consider the following table, which outlines the necessary records and their purposes:
| Record Type | Host Name | Description |
|---|---|---|
| MX | @ | Routes mail to Microsoft 365 inboxes. |
| CNAME | autodiscover | Supports automatic mail setup. |
| TXT | @ | Verifies domain ownership and SPF records. |
Once you’ve added the necessary DNS records, it may take some time for the changes to propagate across the internet. After that, you should test your configuration to ensure everything is set up correctly. Use diagnostic tools like the Microsoft Remote Connectivity Analyzer to confirm that your email, calendar, and web apps are functioning seamlessly. With the right configuration, your new domain will be fully integrated with Microsoft 365, providing a robust foundation for your communication and collaboration needs.
Best Practices for Managing Your Domain and Microsoft 365 Subscription
Managing your domain alongside your Microsoft 365 subscription can significantly enhance your online presence while ensuring seamless integration of your tools. To start, it’s essential to keep track of your domain settings. Regularly log in to your domain registrar’s dashboard to check for any updates or necessary renewals. Make sure to use a strong password and enable two-factor authentication to secure your account. Document any changes you make to your DNS settings, as this will help you troubleshoot issues in the future.
When configuring your domain for use with Microsoft 365, it’s vital to understand the different DNS records that need to be added. These include:
- MX Records: Direct email to your inbox.
- CNAME Records: Link your domain to services like Teams and SharePoint.
- TXT Records: Authenticate your domain to prevent spoofing.
Make sure that these records are accurately set, as this can impact email delivery and other functionalities associated with Microsoft 365 services.
Lastly, it’s beneficial to routinely audit your subscription options within Microsoft 365. Assess your current plan and the tools that you are utilizing. You may find that upgrading to a more comprehensive plan saves money in the long term or offers features that can streamline your workflow. Keep an eye out for any promotions or licensing changes. The pricing structure for Microsoft 365 is often updated, and being knowledgeable about the latest options can help ensure you’re not overpaying for services.
Q&A
Q&A: Buying a Domain with Microsoft 365
Q1: What is the significance of purchasing a domain through Microsoft 365? A1: Buying a domain through Microsoft 365 allows you to establish a professional online presence with a custom email address that incorporates your domain name, such as yourname@yourcompany.com. This helps enhance brand credibility and fosters customer trust. Additionally, integration with Microsoft’s suite of services, like Teams and Outlook, streamlines communication and collaboration.Q2: How do I buy a domain through Microsoft 365? A2: To purchase a domain through Microsoft 365, first, go to the Microsoft 365 admin center. From there, navigate to the ”Setup” menu and select “Domains.” You can either buy a new domain directly through this interface or add a domain you’ve purchased elsewhere. The process is user-friendly, guiding you through the steps to configure your domain settings and link it to your Microsoft services.
Q3: Can I use an existing domain with my Microsoft 365 account? A3: Yes, you can definitely use an existing domain with your Microsoft 365 account. Simply follow the instructions in the admin center to add your existing domain. Microsoft will provide the necessary verification steps to associate the domain with your Microsoft 365 services, ensuring you can use your custom email alongside other productivity tools.
Q4: What are the costs associated with buying a domain via Microsoft 365? A4: The cost of purchasing a domain through Microsoft 365 varies depending on the domain name you choose and its availability. Typically, domain prices range from $10 to $50 per year, plus applicable taxes. It’s worth noting that a Microsoft 365 subscription may also incur a monthly fee, but many users find that the value outweighs the cost due to the numerous features and services provided.
Q5: Are there any additional benefits to buying a domain with Microsoft 365? A5: Absolutely! When you buy a domain through Microsoft 365, you not only get integration with essential productivity tools but also access to features like Microsoft Exchange for email hosting, OneDrive for cloud storage, and Teams for collaboration. Plus, Microsoft’s robust security measures help protect your data, giving you peace of mind while you manage your online business.
Q6: What should I consider when choosing a domain name? A6: When selecting a domain name, consider the following tips: keep it short and memorable, use keywords relevant to your business, avoid complex spellings, and check for trademark issues to ensure it’s unique. Additionally, choose a domain extension (.com, .net, .org, etc.) that aligns with your business purpose, as this can influence customer perceptions.
Q7: Can I change my domain in Microsoft 365 once I’ve purchased it? A7: Yes, you can change your domain in Microsoft 365, but it’s a process that requires careful planning. You’ll need to add the new domain, verify it, and then update your email addresses and other services associated with the original domain. Be prepared for some downtime during the transition, as emails and links may need to be reconfigured.
By addressing these common questions, you can navigate the process of buying a domain through Microsoft 365 with confidence, setting your foundation for a successful online presence.
Insights and Conclusions
navigating the world of domain purchasing through Microsoft 365 can seem daunting at first, but with the right guidance and understanding, it becomes a seamless process. By leveraging Microsoft 365’s robust tools and features, you not only gain a professional domain but also enhance your business’s online presence with integrated solutions tailored for growth. Whether you’re a small business owner, a freelancer, or an entrepreneur looking to make your mark, securing a domain through Microsoft 365 can set the foundation for your digital identity. So take the plunge, explore the possibilities, and watch your online journey unfold with confidence and ease. Happy domain hunting!